In this part of series, I am going to show you how to create an XMPP chat server.
To build your own XMPP based chat solution in android, you need to have two important things:
- XMPP based chat server
- XMPP integration in your android code
XMPP chat server or XMPP server is the one that handles chat database, configurations, user, options etc. Basically, it is a chat server that handles your chat backend. What remains is to implement the chat in your own language and have fun.
There are many variations of XMPP chat servers available today. You can use any of them depending on your requirements and available configurations. What I would recommend are openfire and ejabberd.
Personally, I am going to use ejabberd to setup XMPP chat server. Let’s get into action. First, you will need a web server.For now, I am using DigitalOcean VPS with Ubuntu Server 14.04 LTS installed, to host the server. Don’t worry if you do not have a VPS right now. You can still test it with your own localhost machine.
Installing Ejabberd
Run following command in your terminal to update current package list.
sudo apt-get update
To install ejabberd, just enter the below command and you are done. So easy.
sudo apt-get -y install ejabberd
This will install ejabberd and will also create a configuration file which you can edit to have your own jabberd configuration. The ejabberd configuration file can be found at /etc/ejabberd/ejabberd.cfg. Lets edit it. Back on your terminal screen, enter this command to edit the file:
sudo nano /etc/ejabberd/ejabberd.cfg
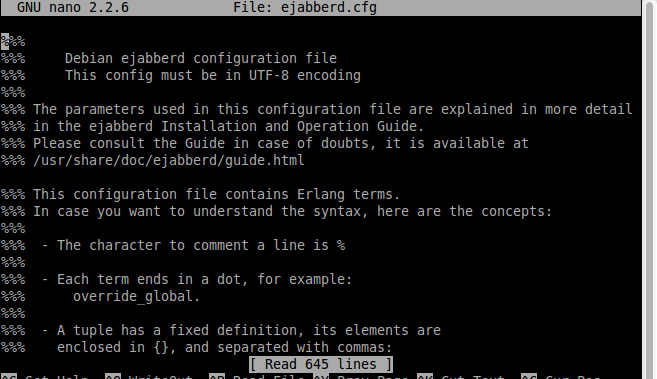
This will bring up nano editor, where you can use up and down keys on your keyboard to edit the file. For Ubuntu desktops or other graphical environments, you can use gedit. Hence, use this command instead sudo gedit /etc/ejabberd/ejabberd.cfg
In the editor screen, You’ll see a lot of text there and lot of options. Don’t panic. You only have edit 3-4 options overall. I will be doing them below, so pay attention.
The ejabberd.cfg file will look something like this:
Use your cursor to move below and find the line which has this text:
%% Admin user
{acl, admin, {user, "admin", "localhost"}}.

%% Hostname
{hosts, ["localhost"]}.
Lets decode what’s written line by line so that you can get confortable enough to do this on your own next time.
Admin user defines what user (user must be registered with ejabberd) holds the administrative privilages of ejabberd server. {acl, admin, {user, "admin", "localhost"}}. This line tells that user with username admin@localhost is admin of ejabberd configuration. We can add multiple users here to make them admin. Let’s add one. So, press enter key and add similar line with different username.
{acl, admin, {user, "myusername", "localhost"}}.
The file will now look like:
%% Admin user
{acl, admin, {user, "admin", "localhost"}}.
{acl, admin, {user, "myusername", "localhost"}}.

%% Hostname
{hosts, ["localhost"]}.
You might be wondering the user “myusername” isn’t yet registered with ejabberd, how come we defined here. We will registered him shortly after we are done with editing configuration file.
Hostname defines the server at which ejabberd should listen and connect. If you are not using a local machine (i.e you are using VPS such as DigitalOcean) to host the XMPP chat server, you can mention the domain name or IP address here. I am assuming example.com as my VPS domain name, hence I will modify this line as:
{hosts, ["localhost","example.com"]}.
Thats all the changes you have to make for now. Wasn’t that simple? Once you have made the above changes, the cfg file will now look like:
%% Options which are set by Debconf and managed by ucf

%% Admin user
{acl, admin, {user, "admin", "localhost"}}.
{acl, admin, {user, "myusername", "localhost"}}

%% Hostname
{hosts, ["localhost","example.com"]}.
Now exit the nano editor by pressing CTRL + X. This will prompt you if you want to overwrite the previous cfg file, press Y, then press Enter again to confirm. This will bring you back to terminal screen.
We have mentioned that “myusername” is another user holding administrative rights to ejabberd, but we still haven’t registered him yet. Lets register him as well. Enter following command to register:
ejabberdctl register myusername localhost password
Replace “password” with whatever password you want to use to login. Once you are done with this, You have to re-start your ejabberd server by issuing this command:
sudo service ejabberd restart
Congradulations, We have successfully setup our ejabberd chat server. Lets visit the administrative control panel and see what we got there. Fire up your public domain name in your favorite browser on port 5280 to login to ejabberd server: http://example.com:5280 .This will bring up webpage asking you for username and password. Login with username: myusername@localhost, password: whatever you mentioned earlier.
NOTE- The localhost in above username myusername@localhost represents domain name of user. If you are not sure, edit ejabberd.cfg and check for user. The line, for “myusername” looks like {acl, admin, {user, "myusername", "localhost"}}, the last part is domain name.
EDIT- For users running on local machines, you can simple use http://localhost:5280. To find your locally accessible ip address, run following command (ipconfig for windows user):
ifconfig
and look for address in the form 192.168.0.xxx.
Once done, following screen will show up:

You have now successfully installed ejabberd on your machine and can be used to connect to any XMPP based chat client. In the next post, you’ll learn how to implement XMPP chat client in android code. Have fun!!
Thanks for going threw entire long post. Please like and share if you like the article. Ask anything in comments below.
Troubleshooting:
Sometimes, ejabberd might not open up in your browser and will give Connection timed out error. It usually happens if firewall is blocking ports on which ejabberd relies for communication stuffs. Usually those ports are 5222, 5269, 5280. You can try opening those ports like I did below:
- Enter following commands in terminal:
-
iptables -A INPUT -p tcp --dport 5222 -j ACCEPT iptables -A INPUT -p tcp --dport 5269 -j ACCEPT iptables -A INPUT -p tcp --dport 5280 -j ACCEPT - Open up
/etc/hostsfile.sudo nano /etc/hostsand add your domain name into it (assuming your public ip address is 123.123.10.210) : -
123.123.10.210 example.com - Allow ubuntu firewall
-
sudo ufw allow 5222
sudo ufw allow 5269
sudo ufw allow 5280
This will open the ports and allow public connections, which should fix the issue.